Friday 9 February 2018
A few minutes at UKBITS, Ashby de la Zouch, Leicestershire
Monday 10 April 2017

Wednesday 27 July 2016

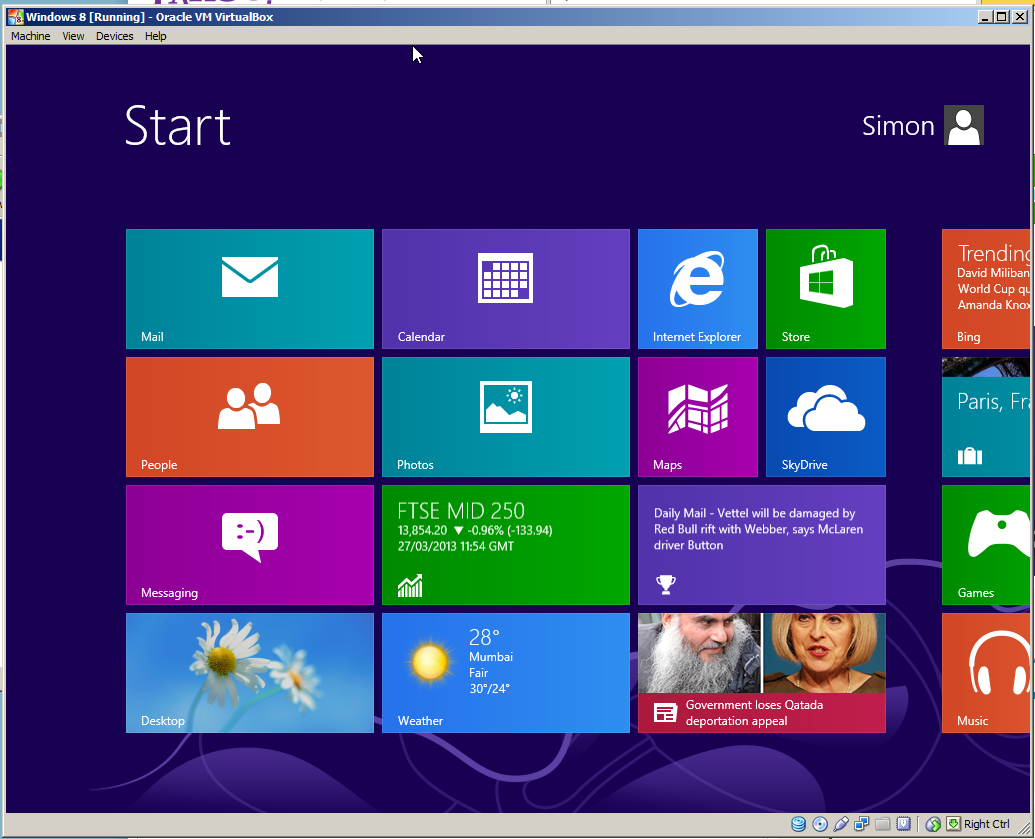
Wednesday 27 March 2013
Test Drive Windows 8 As a Virtual Machine - Free for 90 days!
If you want to trial Windows 8 but don't want to go to the expense of purchasing a new machine, or don't want the hassle of installing it as a dual boot, then try installing it as a virtual machine. I followed the steps shown below without any problems and was up and running in a couple of hours.

Step 1
Download 90 day trial of Windows 8 from www.tinyurl.com/8Latd3
(You will need to login to Microsoft's site, I used a Hotmail account)
Step 2
Install Oracle's VM Virtual Box from https://www.virtualbox.org/wiki/downloads
(Accept the defaults during installation)
Step 3
Click 'New', enter a name for the Virtual Operating System such as 'Windows 8'
Click 'Next' to accept default memory size, 'Create', 'Next' to accept VDI image
Click 'Next' to accept dynamically allocated storage, click 'Create' for file location and size
Step 4
Click the green 'Start' arrow, Click 'OK' to any errors or notifications that appear, Click the folder icon to the right of 'Host drive E:'
Browse to the Windows 8 file downloaded in Step 1. Click 'OK' to acknowledge any information or warning dialogue boxes
Step 5
Windows installation will begin. Follow the prompts as you would with a standard Windows installation.
Step 6
When prompted, choose 'Custom' installation
Step 7
Click 'Next' and put the kettle on
Step 8
When you have finished using Windows 8, select 'Close' from VM Virtual Box's Machine Menu, this is the same as shutting down a physical machine running Windows 8
Friday 26 October 2012
How to Set Up Windows Server 2008 Backup Notification Emails
This is for the benefit of anyone who might find themselves needing some pointers when setting up the backup on Windows Server 2008 or, more likely, email notifications from the server.
We have a new customer who recently invested in a new database/CRM and needed to ensure their backups were working correctly.
They are running Windows Server 2008 with minimal roles installed, no exchange and simple file sharing.
The Windows backup was set up to backup to either of two portable USB drives which are usually rotated every night with one being stored off site.
Unfortunately, only one of the drives had ever been configured for use by the backup and the second one had been failing for around a month other reasons, however nobody had been shown how to access the server to check and their critical data remained unprotected.
And so to work.
Firstly, we repaired the backup and set it up to use the second drive as well as the first by going into ‘Windows Server Backup’ and making a change to ‘Backup Schedule’ in the right pane.
Leave the selection on ‘Modify Backup’ on the first window and work your way through to ‘Add or remove backup disks’ where you can select ‘Add more disks’.
Leave the selection on ‘Modify Backup’ on the first window and work your way through to ‘Add or remove backup disks’ where you can select ‘Add more disks’.
Don’t forget that disks for Windows Server Backup on 2008 need to be dedicated – you can’t use them for any other storage and they won’t show up with a drive letter in ‘Computer’.
Another useful point is the quick removal setting.
If you go to ‘Device Manager’ and select your USB device -> Properties, and click the ‘Policies’ tab.
If ‘Optimize for quick removal’ is selected, as is explained next to the radio button, the device can be removed without having to log in and go through the ‘Safely remove hardware’ process before changing USB drives – something of a timesaver.
OK, now the notifications.
In the Windows Server Backup, there is no built in method of notifying any user of the success or failure of the backup.
There is a slightly sneakier way to work around this by attaching a task to certain events in the Event Log.
There is an option to set the task to send an email when these events appear in the log, however there is no way to apply any SMTP login details to this task which makes it pretty difficult to get to work.
The way I found to get around this is to use a third party stand-alone emailing program utilised by a batch file which is activated on certain events appearing in the Event Log.
My solution……
Firstly, download the free sendemail client from the creator’s website:http://caspian.dotconf.net/menu/Software/SendEmail/
There are a couple of zip files you can download depending on your requirements, I needed the one with TLS support.
Extract the contents of this zip file to an easy to find folder on your server – for this example, to C:\Sendemail
Create two batch files to use with the Event Log tasks – one for failure and one for success.
In order to make it look good, I added two users to an SMTP server, Backup.Success@domain-name.co.uk and Backup.Failed@domain-name.co.uk , although you can just use backup-notification@your-domain.co.uk for simplicity.
In order to make it look good, I added two users to an SMTP server, Backup.Success@domain-name.co.uk and Backup.Failed@domain-name.co.uk , although you can just use backup-notification@your-domain.co.uk for simplicity.
To create your batch files, open notepad and save the empty file with ‘File->Save as’ into C:\Sendemail by changing the ‘Save as type’ dropdown option to ‘All Files’ and naming the files with the .bat extension.
Name one file ‘backupsuccess.bat’ (don’t miss the .bat part) and then do the same again and save the second file as ‘backupfailure.bat’
Now you have the two batch files in the Sendemail folder, right click on ‘backupsuccess.bat’ and select ‘Edit’.
Now copy and paste the following details into it and replace anything Bold with your own data. There should only be 3 lines in each of these files, everything after Sendemail should be on one line:
REM Uses sendemail.exe to send an email from (-f) to the recipient (-t) when an event 4 (Backup Successful) appears in the event log.
cd c:\Sendemail
sendemail -f Backup.Success@domain-name.co.uk -t recipient@ofnotification.co.uk -u "Backup Successful" -m "The backup finished successfully, please change the portable USB drive in readiness for tonight's backup." -s SMTPserver.Hostname.co.uk -xu backup.success@domain-name.co.uk -xp password
Close down this file and save it, then right click on the ‘backupfailure.bat’ and do the same again with the following data:
REM Uses sendemail.exe to send an email from (-f) to the recipient (-t) when an event 19 or 49 (Backup Failures) appears in the event log.
cd c:\Sendemail
Again, close and save changes to this file.
Now your batch files are ready you can test them to make sure you’ve got it right by running them, but before you do, you may want to substitute recipient@ofnotification.co.uk with your own email address for the purpose of this.
You can also add a new line at the bottom of the batch file which simply says:
You can also add a new line at the bottom of the batch file which simply says:
pause
This will keep the command window open after it has run until a key is pressed so you can see if there are any problems with the batch file but remember to remove this line and change the email address back after you’ve finished testing and troubleshooting.
The last step is to attach the tasks to the relevant events.
There are two ways to do this, through the Event Log (which requires events 4, 19 and 49 to already be logged), or the following:
There are two ways to do this, through the Event Log (which requires events 4, 19 and 49 to already be logged), or the following:
Open Start->Administrative Tools->Task Scheduler.
In the right pane, select ‘Create Basic Task’ and give it a name – I suggest ‘Backup_Success_Event_4’ and click Next.
Under the ‘Trigger’ options, select the bottom option ‘When a specific event is logged’ and click Next again.
On the next screen, under Log, select ‘Microsoft-Windows-Backup/Operational’, under Source, select ‘Backup’ and under EventID, enter the number 4, and click Next.
On the Action screen, ensure that ‘Start a program’ is selected and click Next.
On this screen, use the Browse button to select C:\Sendemail\backupsuccess.bat, click Open, and then click Next.
Note, on the Finish screen, you will need to ensure you tick the box next to ‘Open the Properties dialog for this task when I click Finish’, and click Finish.
You now need to select ‘Run whether user is logged on or not’ and ‘Run with highest privileges’ and click OK.
You now need to select ‘Run whether user is logged on or not’ and ‘Run with highest privileges’ and click OK.
That’s it for the Successful Backup Notification.
In order to do the same for failures, you need to go through the process above another two times.
When naming the task, use the names ‘Backup_Failure_Event_19’ and ‘Backup_Failure_Event_49’, and instead of applying to EventID 4, apply them to EventID numbers 19 and 49 respectively.
This time, you will browse to C:\Sendemail\backupfailure.bat to apply to these two tasks.
This time, you will browse to C:\Sendemail\backupfailure.bat to apply to these two tasks.
Now hopefully, you will get a notification of failure or success as soon as your Windows Server Backup completes.
Thursday 30 August 2012
Office 2003 Terminal Server Issue on SBS 2011 or 2008 Server.
After installing a nice shiny new SBS 2011 server for one of our customers, we encountered an issue which was difficult to find a way around.
They have a requirement for remote access so Terminal Services (remote desktop) was enabled and set up.
At the point where we tried to install Office 2003, it seemed to install correctly but as soon as I tried to run Word, Powerpoint or Excel, I got the error message 'This feature is not available, contact your administrator' (or words to that effect).
Now a bit of basic Googling will lead you to the classic 'change user /install' and 'change user /execute' commands which are actually automatically applied when you use the 'Control Panel->Programs->Install Application on Remote Desktop...' route.
I tried various permutations of these installation methods including running the Office Setup.exe as administrator with no success.
Having gleaned a few bits of information from others having similar problems I came up with a solution that worked for me.
Firstly, I installed Office using 'Control Panel->Programs->Install Application on Remote Desktop...'.
Then the fix:
It would seem that the initial problem is related to permissions on a folder buried inside the AllUsers folder.
This brings about problems of it's own as the folder is hidden and locked.
In short, if you click Start and Run and type/copy & paste "C:\ProgramData\Application Data\Microsoft\Office", you should see a DATA folder in the resulting window.
I right clicked on this and under the security tab, gave 'Everyone' full permissions.
This then enabled me to run Word and Excel without the error window popping up, but the EULA kept appearing every time either one was opened.
In order to try to resolve this final niggle, I right clicked on Word and looked for 'Run as Administrator' but it wasn't available so I selected properties and 'Advanced' but 'Run as Administrator' was greyed out.
I selected the 'Compatibility' tab and put a tick in the 'Run this program as an administrator' box under 'Privilege Level' followed by Apply and OK.
I ran Word again, agreed to the EULA and closed it back down again, went back into Word's properties and removed the tick, applied and okayed it and re-ran Word... resolved!
Following the same procedure on Excel had the same results and now both run happily.
Simples!
Wednesday 1 August 2012
Amanda Ogelsby Charity Skydive

On Sunday 29th July 2012, Amanda Ogelsby bravely leapt from a plane above Nottinghamshire to raise money for Diabetes UK. If you would like to make a donation to Diabetes UK, please do so at Amanda's 'Just Giving' page
To share Amanda's Skydive experience, click here to view her video.
Subscribe to:
Posts (Atom)